Monday, February 28

And this is where we differ...

As a property owner, I'm constantly on the defense. I feel like if I don't watch the walls, carpet, water heater, outlets, etc., the whole place will fall down around me. While in the shower this evening, I noticed just such a thing, as the paint close to the ceiling was bulging with a load of water behind it. I slit the bubble and out poured the water. I moved the curtain rod and the paint behind it mushed away too.

I start trouble shooting about what needs to be done (put a fan on it, dry it out, use a putty knife to peel/scrape away the damaged area, put the fan on it some more, make sure it is super dry, apply new mud (hopefully the drywall doesn't need to be replaced), sand it down, re paint, re caulk the seams, call it a day) and think that this won't be a bid deal (I am still enjoying my shower, mind you.) I go and let D know that the shower curtain will now be hanging about five inches lower so the steam can escape to the exhaust fan in a timely manner, and there will be a small DiY project on Wednesday (the day I'm off from my NEW JOB! more on that some other time) and he looks at me like I'm crazy. I tell him he can go look at the bathroom if he's confused.

He takes one look at it and says,"Why don't we hire someone?" In my head I start my rebuttal: "But this is so simple!", "I don't have money to hire someone!" ,"Hiring someone is such a waste of money!", "Don't you want to do this with me to learn for next time?", "Are you SERIOUS?"

My mom would be so proud of me. I didn't say any of those things. What I said was, "I just figured out what the problem is. I don't know what I want to do yet."

I forget sometimes that I enjoy the fixing process way more than D. Car head light is out? I buy the bulb, pop the hood and do the work. Plug on the dryer blows? I call my dad for the 411 on electrical DiY and go to Lowe's for the part, 10 minutes, and it's done. I want shelves. I put them up. I want a dimmer switch...(ok, my dad did that one, but he was here and he showed me, and I swear I'll do the next one!) Carpet cleaning, tile grouting, light fixture fixing...I like figuring it out. I shouldn't get exasperated or irritated when D helps by offering what any sane person would do - pay someone to make the problem disappear. I'm lucky that he isn't trying to rip it down himself, only to leave a huge hole and a broken pipe!

I will think this through, this hiring of a professional.

Even though I can do it myself, I have such a hard time admitting that someone else would probably be a better choice. Because I'm awesome. At a lot of stuff. Especially stuff in my house that I then get to look at all the time and feel proud that I fixed it. Myself.

Thursday, February 17

Lamp shade project

D picked up a lamp from a 2nd hand store a few years ago, and I finally got him to let me play with it. Originally, it had a beige cover with black feathers around the bottom, and I wanted to chuck the thing across the bedroom. The shade had a crack in it, and I didn't understand why D was so attached. Well, D is out of town, so I'm recovering it!

First I took the shade all the way apart. I brushed off the shade with a damp cloth to remove dust, then found some fabric I wanted to use.

Using the open shade as a template, I traced the shade with an added 1/2 inch border. (I used a 1/4 inch, and it just wasn't quite enough to make me comfortable when I wrapped the fabric to the frame again.)
For this next part I moved to the kitchen floor and busted open a box (specifically, a Goose Island Honker's Ale) to protect from over spray. Use your favorite spray adhesive and coat the outside of the lamp shade. Before it dries, put the fabric on the outside of the lamp shade.

Some helpful tips for this part:

1 - Put the fabric right side down and place the shade on the fabric, instead of putting the fabric on the shade.

2- Start in the middle of the shade and gently press the fabric in place, leaving the 1/2 inch of fabric on both sides. As you work your way to each side, press out any bubbles or wrinkles.

3 - Also to make a clean edge on the seam when the shade is put back together, the shade should be moved just a bit to one side so the shade edge is not covered in fabric. See photo below.


Reassembling the shade:

1 - Using a hot glue gun, attach the extra flap of fabric around the edge of the seam edge. After it is pressed down, hot glue this "finished edge" to the other edge side, re-forming the shade to a 3 dimensional shape. I used binder clips to help hold things in place.

2 - Insert bottom ring and fold 1/2inch of fabric around the metal. Use a hot glue gun to secure fabric to ring. Use the same technique for top ring.

If you want to add a little extra, you can glue a strand of ribbon around the brim of the shade. Move very carefully around the edge, gluing and pressing the ribbon small sections at a time. The extra ribbon can hang down, or be wrapped around to the back of the shade and held in place with glue.

This took me about 35 minutes once I had the fabric picked out and I found my glue gun. I like how it turned out!


Wednesday, February 16

chair covers


The photos don't do them justice, but this is the latest project I was asked to do. Six sets of chair covers for some office chairs. My clients dropped off the fabric they chose in a gigantic roll, freshly ordered and untapped - yards and yards to work with. I didn't come close to using it all, but there may be another two chairs to recover from them, if they are happy with my work. Yay! Custom orders!

My V day

I am happy to say I didn't fall into a chocolate induced coma this year for Valentine's day. D and I decided to try out luck going out for dinner at Destihl, and were successful: a table with no wait and no reservation. One of our dear friends was working, which was a perk, and the food was wonderful.

Instead of chocolate, or some other typical valentine's day gift, D gave me a pound of meat. Peppered turkey, to be specific. A few weeks ago we were listening to Tony Kornheiser's podcast and they were joking about giving meat to women as a gift, instead of the typical chocolate, jewelry, etc. I turned to D and said, "I'd be happy with some meat." I didn't think he heard me. I just laughed when I opened it. It was perfect.

D's mom sent us these cards. They are so cute I had to share them! I hope you had a great V-day too!


Friday, February 11

Dresses and wonderlust


With friends and family weddings coming up this summer and fall, I've been visiting wedding sites to look for ideas to share. I'm sure the ladies don't need help finding a dress, but aren't the two below so pretty?


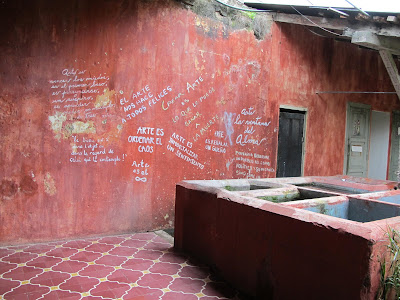
Yesterday I printed off some photos of Guatemala (some photos below) and put them around the house. Everything is so white and gray outside, it helps to have some extra green, yellow, and bright blues from the weeks in Antigua. It had me thinking about all of the language schools there, remembering how great it would be to go down again to study Spanish from one of them. There are some great two minute videos on Vimeo called Live the Language - here is one for Paris - that looks magical.


Sunday, February 6

AJH on facebook

Hi friends! I just made a facebook page to connect with all those facebook savvy folks out there. Being that today is the Superbowl, I won't have project photos up today, but, very soon. If you are one of those facebook savvy folks mentioned, feel free to stop by and leave me a note! I love messages and comments!

Saturday, February 5

Cinnamon Blackberry scones - mini scones!


This morning was an experiment between regular flour + baking soda + salt vs. self rising flour (which has all of that included in the bag.) I was super happy with the self rising flour. My scones were lighter, and the butter layers left visible air pockets, making for a moist, yet hearty texture.

Today's recipe:

Dough:
2 cups self rising flour
4 Tbs butter
3 Tbs sugar
1/4 frozen blackberries
1/2 Tb cinnamon
1/2 Cup buttermilk
1 large egg
1 tsp vanilla

Glaze:
2 Tbs cream cheese
3 Tbs powdered sugar + a little more
1 tsp cinnamon
1 tsp vanilla
about 2 Tbs milk - enough to thin to desired consistency

Directions:

Mix egg, vanilla and buttermilk in small bowl. In large bowl, combine remaining ingredients and toss lightly. Add all but 2 Tbs of egg mixture into dry ingredients, mixing until they just start to come together. Transfer to counter and hand knead 8-10 turns, not over mixing batter. Divide dough into three parts, making each part into a small round, about 1 inch thick. Divide rounds into 6 wedges and place on non-greased baking sheet. brush tops of scones with remaining egg mixture.

NOTE: Yes, these will be little, mini scones!

Bake for 10-12 minutes in 425 degree oven.

While scones are baking, in small bowl, mix cream cheese (easier if this is near room temperature) powdered sugar and cinnamon together. Slowly add milk until desired consistency is reached - to check, dip spoon in glaze and pull out, letting glaze fall off in a drippy strand. If it doesn't fall easily, add more milk.

You can brush glaze on the warm scones, or drizzle it by dangling glaze a few inches above scones and make zig-zag patterns on top.

Enjoy!


Friday, February 4

Pecan Raspberry Scones with Orange Glaze


With the big snow day, I was hoping to fill the house with lovely smells and treats when we were locked in the house, but after my birthday baking bonanza, I was out of flour, of all things. So, yesterday Dan and I took the recycling out and ventured for staples. This morning, I took advantage of having the morning off and made the promised treats. I adopted my recipe from Seattlest blog.

Scone:
2 cups flour
2 tsp baking soda
1/2 tsp salt
1/4 C cold butter
3 Tbl sugar
1/2 cup chopped nuts (I used both pecan and macadamia)
1 Tbl orange zest - or the zest from one medium orange
1/4 cup frozen raspberries
1/2 cup buttermilk
1 large egg

Glaze:
1/4 powdered sugar
1 Tbl orange zest
Juice from 1 medium orange

Directions:
Combine flour, baking powder, and salt in a bowl. Work butter into flour with your hands, making small pieces about the size of peas. In small food processor, or by using a knife, chop nuts into small pieces. I also chop the raspberries, making them more evenly distributed in the mixture (if you like large pieces of fruit, feel free to keep them whole.) Add nuts, orange zest, raspberries. In separate small dish, combine buttermilk and egg. Pour egg mixture into flour, leaving about 2 tablespoons in the bowl to use to brush the scones before baking.

Mix together until ingredients are combined. Do not over mix. Kneed mixture 8-10 times, then form into a round about 1 inch thick. Cut into 8 wedges and use the remaining egg mixture to coat the tops.

Bake on an non-greased baking sheet in a 425 degree oven for 12-15 minutes, or until edges begin to golden. Place on cooling rack.

For glaze, combine ingredients until smooth, and brush, or spoon, or drizzle (who really cares how it gets on top) the glaze while scones are warm.

Some notes:

I don't have a basting brush, so since my hand were already messy from kneading the dough, I just stuck them in the egg mixture an patted it on the top. It won't anything. I promise. I also don't have a fancy micro plane for zesting or grating nuts, but I think the small side of a box grater works just fine. If you aren't comfortable zesting fruit, just remember to keep rolling the fruit as you push it though your grater. When you reach the white parts, you are into the rind, and there aren't any tasty oils in there. Also, this took two oranges, but only the juice fro one. Keep that second orange! It's still good! Slice it up to serve with your scones, or save it for your next recipe that calls for juice.

Feel free to shift around your flavor parts. I like to think that scones are like a puzzle, and the color, flavor, and "fun parts" can be changed easily. If you don't like raspberries, feel free to put in black berries, blue berries, or cranberries. Not a nut fan? Try cinnamon, or vanilla bean. Orange make you cringe? Maple makes for a nice glaze, or copy what is on the inside - make a raspberry (or black, or blue, or cranberry) one. If you look at the original recipe, I like that it has both salty and sweet elements, and I put my twist on it here.

Have fun!


Wednesday, February 2

Photos of the Blizzaster...and cats.


(About 3pm)

I took some shots of the huge snow storm that came through the country yesterday.


(About 6pm)


(This morning about 10)


We were all feeling a little cooped up this morning, between coffee, sewing, and reading, I was being obnoxious with my camera (and playing with the cats, too). One can never have enough adorable pictures of one's cat, right?

Kodak!

Kodak!

Comma watching Kodak, safely hidden under the couch.


Comma enjoying some sun

Baxter also enjoying the sunshine

Comma showing her impatience with all the attention bestowed upon her from the snow day.

It all could have been a lot worse. If you haven't seen any footage of what happened on Lake Shore Drive, up in Chicago, I encourage you to check it out.
Related Posts Plugin for WordPress, Blogger...